Design & Objects

Objects

Page Elements

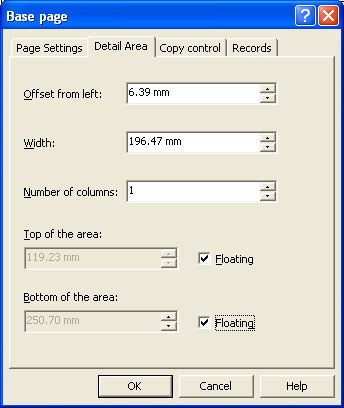
Creating Page Elements - Detail Area
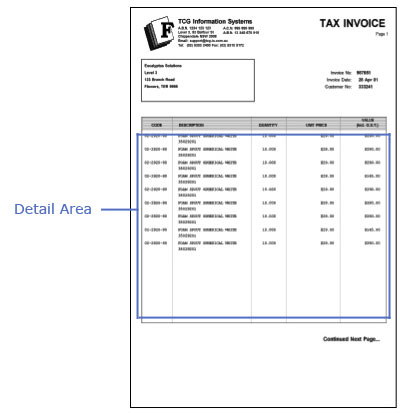
The Detail Area is a bounding box surrounding the incoming variable data. A Detail Area needs to be defined as part of the Base Page if you intend to include the variable detail lines from the data file. The figure below outlines a sample Detail Area on a form.
There are two types of Detail Areas:
- Static - the Detail Area remains in the same position on each page.
- Floating - the Detail Area moves up and down the page and changes in size to provide room for Report and Page headers and footers.
Static Detail Area
To define a static Detail Area:
- Ensure the Base page is selected on the Go menu. Select Properties of the Base page... from the Define menu.
- Set the properties of Detail Area on the Detail Area tab.
- Un-tick both Floating checkboxes of Top of the area and Bottom of the area.
- Click the OK button. The Detail Area is delineated by a faint grey outline, which can be adjusted using the mouse by pulling the handles. This facility is only available when the Base page is in focus.
Floating Detail Area
To define a floating Detail Area:
- Ensure the Base page is selected on the Go menu. Select Properties of the Base page... from the Define menu.
- Set the properties of Detail Area on the Detail Area tab.
- Tick the Floating checkbox next to Top of the area to make the top edge of the Detail Area float. The top of the Detail Area moves up and down to cater for the Report and Page headers.
- Tick the Floating checkbox next to Bottom of the area to make the bottom edge of the Detail Area float. The bottom of the Detail Area moves up and down to cater for the Report and Page footers.
- Click the OK button.