| |
|
| Moving and resizing objects |
 |
|
|
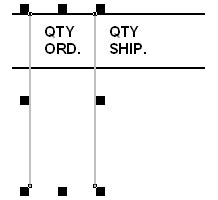
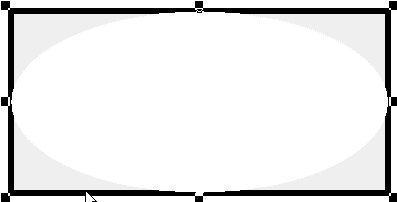
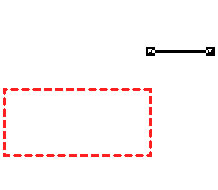
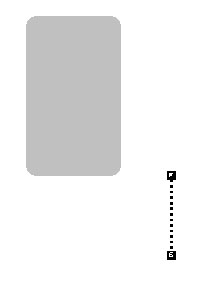
| Nudge Tool Example |
|
Use Difference between selected objects
nudge option to create quantity columns that are equal in width.
|
|
| Top
|
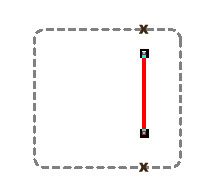
| Aligning Objects Example 1 |
|
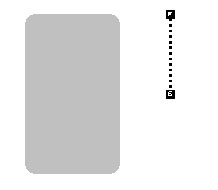
Align the left side of an object to the left side of another object.
Select the object to be aligned.
- Select the Left
alignment tool on the alignment toolbar.
- Click on the left side of the second
object.
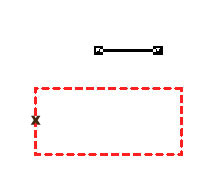
- The first object aligns itself to the
left of the second object.
|
|
| Top
|
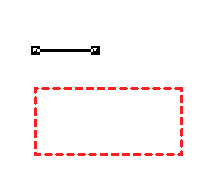
| Aligning Objects Example 2 |
Align the left side of an object to the right side of another object.
- Select the object to be aligned.
- Select the Left
alignment tool on the alignment toolbar.
- Click on the right side of the second
object.
- The first object left aligns itself to
the right of the second object.
|
|
| Top
|
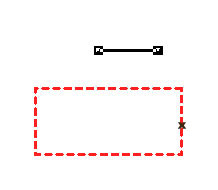
| Aligning Objects Example 3 |
|
Align the top of an object to the top of another object.
- Select the object to be aligned.
- Select the Top
alignment tool on the alignment toolbar.
- Click on the top of the second object.
- The first object aligns itself to the top
of the second object.
|
|
| Top
|
| Aligning Objects Example 4 |
Align the top of an object to the bottom of another object.
- Select the object to be aligned.
- Select the Top
alignment tool on the alignment toolbar.
- Click on the bottom of the second object.
- The first object aligns itself to the
bottom of the second object.
|
|
| Top
|
| Aligning Objects Example 5 |
|
Horizontally center a selected object between the left and right sides
of another object.
- Select the object to be aligned.
- Select the Horizontal
center alignment tool on the alignment toolbar.
- Click on the left and right sides of the
second object.

- The first object is horizontally centerd
between the left and the right sides of the second object.
|
|
| Top
|
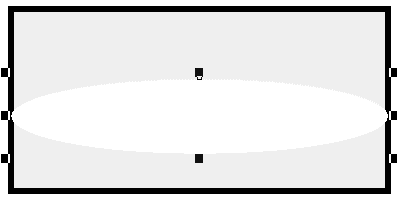
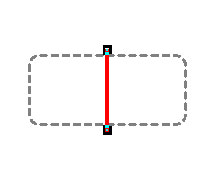
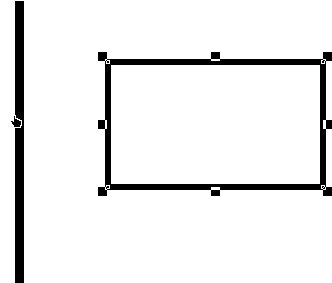
| Aligning Objects Example 6 |
|
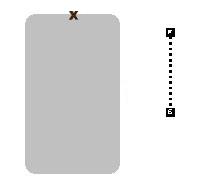
Stretch the vertical line to fit the height of the rectangle.
- Select the object to be stretched.
- Enable the Stretching tool.
- Select the Vertical center
alignment tool on the alignment toolbar.
- Click on the top and bottom sides of the
second object.
- The first object (vertical line), is
stretched to be the same height as the second object (rectangle).
|
|
| Top
|
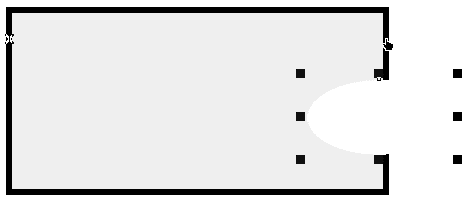
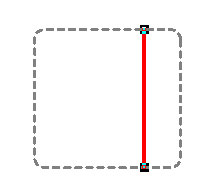
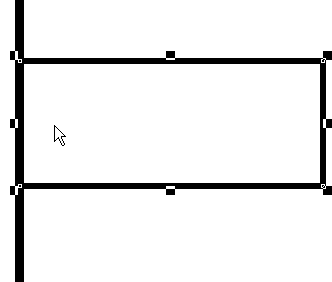
| Aligning Objects Example 7 |
|
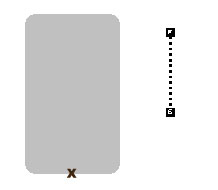
Stretch a rectangle left to meet a vertical line.
- Select the rectangle to be stretched.
- Enable the Stretching tool.
- Select the Left alignment tool
on the alignment toolbar.
- Click on the left side of the vertical
line.
- The first object (rectangle), is
stretched to be the same left as the second object (vertical line).
 |
|
| Top
|
|
|
|