|
When printing to a black and white laser printer, both Blind and
Other colors print as black. To avoid the response shape being
recognized by the OMR, make it one of the "sparse" or outline shapes on
the bottom row (the shape shown below is too wide and high to be seen
with a normal timing line, hence has been included in the "sparse"
shapes).

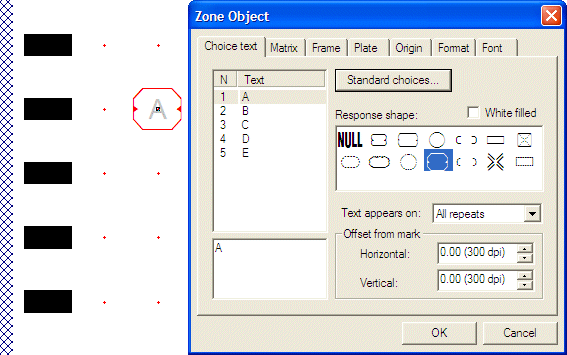
The text for response shapes must either be light grey (to fall below
the scanner’s threshold – see above) or be outside the response shape
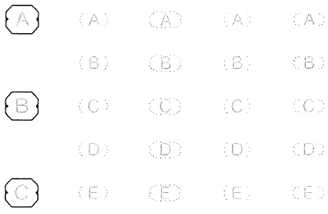
and between timing lines. The first image below shows the font setting
for a B&W laser printer, with the following image showing the
result (this is an actual scan from printed material, so is relatively
poor quality).
 
Your other control over
“blackness” is the toner setting on the printer. For HP color laser
printers, this is menu item Configure Device > Print Quality
> Adjust
Color > Black Density which has a range of from -5 to +5. You
need
to set this up for B&W documents, on older equipment you may
need
to set this down. A sheet is provided that has all of the “B&W”
responses at various grey settings for the response
text. Please
use a value that is not seen by your OMR scanner, but is as dark as
possible to the humans filling in the form. For most work, we prefer a
large response that is outside the timing lines, with response text
outside the response.
See Tuning
your Printer and Scanner.
|


