|
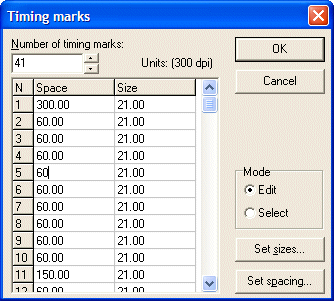
You can change the size and spacing of the timing marks by selecting
the timing line and clicking the Properties button. This window opens:

Timing marks are always numbered from the top
(portrait pages) or left (landscape pages).
In Edit mode, you can type in
the values for each timing mark, or set an identical universal value
for a dimension by clicking either the Set sizes or
Set spacing button. That dimension is
applied to all timing lines.
In Select mode, you can select
a range of values by dragging with the mouse and clicking either Set
sizes or Set spacing to set the
dimensions for the selected range.

This shows space reduction on the first set of
timing marks.
|


