Design & Objects

Objects


Page Elements
Creating Objects - Image
 The Picture tool is used to insert an
image.
The Picture tool is used to insert an
image.
Creating Image Objects
Graphics such as logos and scanned signatures can be inserted easily into the form design. FTDesign supports bitmap (.bmp), JPEG (.jpg), GIF and TIFF graphics. To include graphics in other file formats, you need to convert them using one of the many freely available graphics format converters.
To insert an image:
- Choose Picture from the Draw menu or click the Picture tool button on the toolbar. The cursor changes to a cross-hair pointer.
- Click and drag the mouse diagonally to locate the top-left corner of the picture. The picture draws at it’s native size.
- Release the mouse button and the Picture dialog box will open.
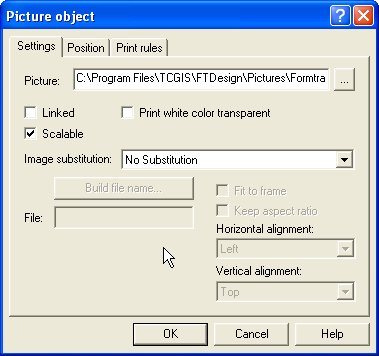
- On the Settings tab, edit
- By clicking the browse "..." button you may choose a different picture file.
- Linked - these pictures are not copied into the form, but referenced by the form from a folder when FTDesign is used. The production system MUST have access to pictures that are linked. To link the picture, tick the Linked checkbox.
- Scalable - these pictures can be resized by moving the black handles when the picture is selected. Holding the SHIFT key down while resizing will retain the proportions of the image. To make the image scalable tick the Scalable checkbox.
- Note: Image scaling is the most process intensive function in FormTrap, for production efficiency build logos and images to their final size using your graphics tools rather than scaling in FormTrap.
- Print white color transparent - Checking this box will make all the white pixels within a picture transparent. The transparent pixels do not print at run time. This option is especially useful when placing a picture on top of a filled/colored background. To make the white pixels within an image transparent check the Print white color transparent check box.
- Image substitution - using image substitution you can insert information from external files onto the output form.
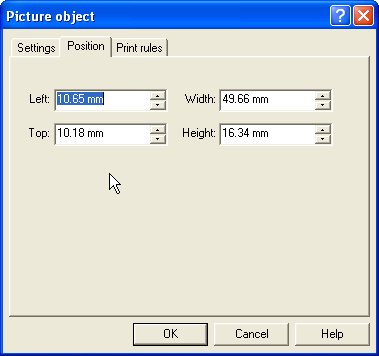
- On the Position tab, edit the image's position and size.
The Print rules tab allows conditions to be set for printing of t his object, see Print Rules for an object.