Remove Redundant Areas
We'll use this example to explain how to remove redundant areas.
NOTE: You must, repeat MUST have the Master area defined
prior to this step.
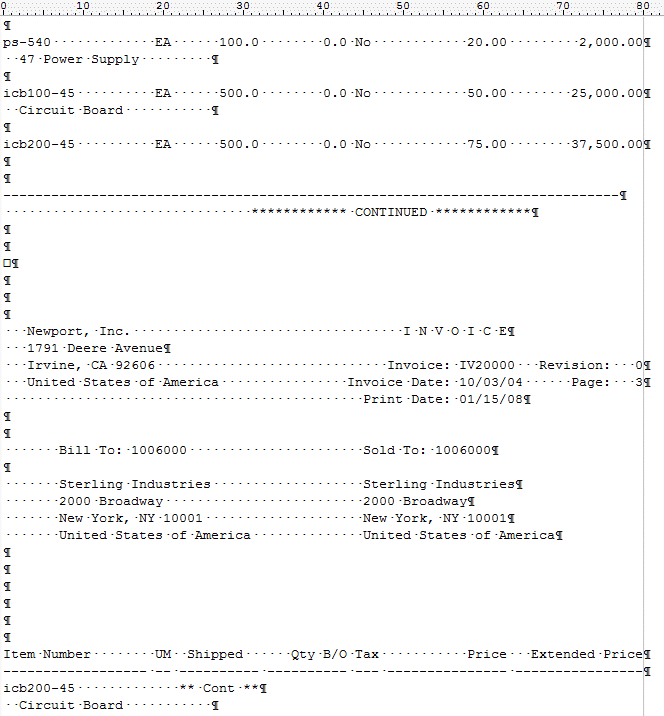
The picture below shows Item Number icb200-45 where
description Circuit Board is on the next page.
For this file, we need to remove the second (and subsequent) page
headers, the line *** CONTINUED and the line above it, the
line ** Cont ** and the detail header that follows
the first page heading. The reason this is not done as part of the
first page header is comment lines may (or may not) occur prior to
the two detail heading lines on the first page only.
These last two have a potential conflict as the same data is carried
in the second page header, at a fixed place.
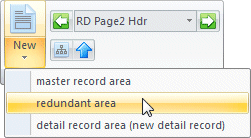
Select New from Area menu and redundant area from
the pull-down.
Move forward using the Document forward page key ![]() until the header for Page 3 is visible.
until the header for Page 3 is visible.
Ignore the default Master outlined in Pink.
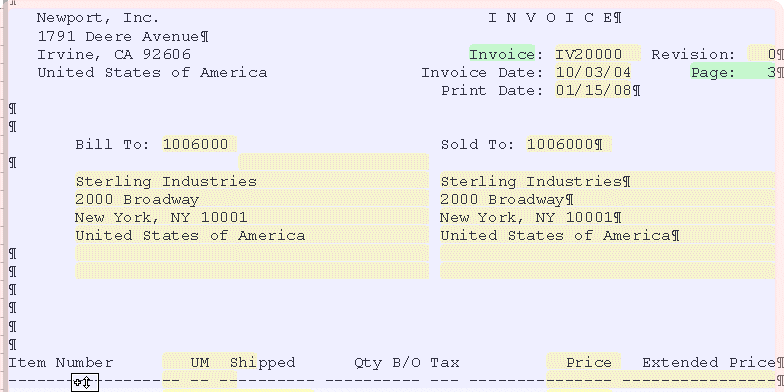
Place the define area  icon on the top line (Newport, Inc.), hold down
Mouse Left while moving the icon down until it covers all header
lines showing as below, about to release.
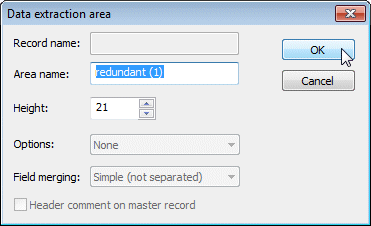
This opens when mouse is released to define the first redundant
area, leave Area name "as is" or change for your purposes
(recommendation is to name redundant records as UNW,
followed by type-of-record, UNW Subsequent Header for this
example).
OK to this window shows the area defined.
If you are still seeing the Master, press the show area toggle ![]() icon to remove
the Header area from view.
icon to remove
the Header area from view.
Define a test field as shown.
Select New from Field menu, drag the I-Bar  cursor over text, then release and Name the
field.
Press Mouse Right and select Properties of area, then define
the rule shown to select Page 2 and greater.
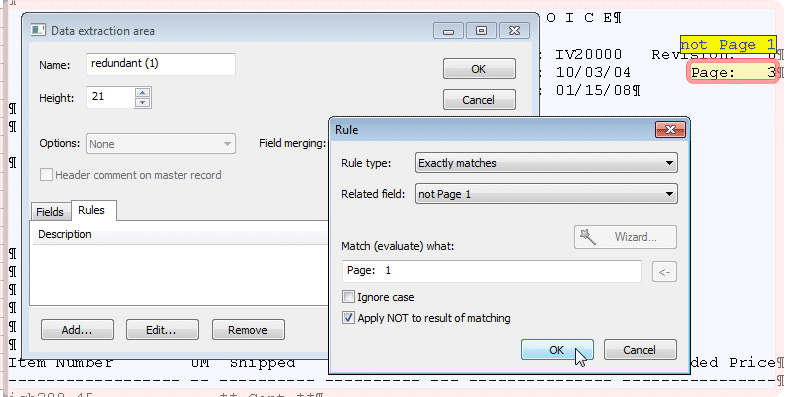
To see redundant area removal, press the redundant record
removal icon  . This is a long operation which is the equivalent
of testing formatting in that it must first build the form, then
runs the production program that strips redundant records.
To view the original file, press this icon  in View.
One of the two above icons is highlighted showing current file
content.
Define and remove all other redundant areas. If there are conflicts
between the second page header (where the lines that head details
are also removed) and the first page (where these lines are defined
as redundant separately), make sure the later case is defined after
the first case.
Check order of evaluation by pressing the evaluation order
icon ![]() in Properties to see and change order.
in Properties to see and change order.


